

How to Choose Durable 3D Printed Signs
Table of Contents
- What Makes a 3D Printed Sign Durable
- Best Material for Outdoor 3D Printed Signs
- 3D Printed Sign Thickness and Durability
- How to Make 3D Printed Signs Stronger
- How to Protect 3D Printed Signs Outdoors
- Designing for Durability: Text, Fonts, and Logos
- Checking Quality Before You Order
- Frequently Asked Questions
Last Updated: October 12, 2026
What Makes a 3D Printed Sign Durable
Durable 3D printed signs resist fading, cracking, and weathering over months or years of outdoor exposure. The key is matching the right material, thickness, and protective coating to your environment.

Durability comes down to material, thickness, and coating, not the printer.
Outdoor signs fail for three reasons: UV damage, moisture warping thin walls, and mounting stress at weak points. Fix those three and your sign lasts.
Best Material for Outdoor 3D Printed Signs
Material choice is the biggest durability decision you will make. The right filament for a shaded verandah is not the right filament for a west-facing wall in full afternoon sun, or for a sign near a pool or coastal fence.
Start by naming the environment the sign will live in, then work backwards to the material.
Matching material to environment
| Environment | Best choice | Acceptable alternative | Avoid |
|---|---|---|---|
| Indoor, climate controlled | PLA | PETG | , |
| Covered outdoor, indirect sun | PETG | ASA | PLA |
| Full sun, hot summers | ASA | UV-stabilised PETG | PLA, standard ABS |
| Coastal, salt spray, high humidity | ASA or PC blend | PETG | PLA |
| Near pool, splash and chlorine | PETG | ASA | PLA |
| High-impact, public-facing | PC blend or nylon | ASA | PLA |
| Very hot surface (metal backing in sun) | ASA | PC blend | PLA, PETG |
Why these pairings work:
- PLA softens around 60°C. On a dark surface in direct summer sun, surface temperatures exceed that and the sign sags, warps, or creeps under its mounting load. Fine indoors and in shade; wrong for anything exposed.
- PETG handles roughly 70-80°C, resists moisture, and prints without a heated chamber, the practical all-rounder for covered outdoor signs. Standard PETG still fades under UV, so pair it with a coating or a UV-stabilised grade.
- ABS has good temperature and impact resistance but poor UV stability and warps badly without an enclosure. ASA is the better outdoor ABS, ABS with UV stabilisers built in, so it holds colour and finish far longer in sun.
- PC blends offer the highest impact resistance of the common filaments and tolerate heat well, but are harder to print, pricier, and often need higher nozzle temperatures and an enclosure.
UV-resistant filament options
Standard filament fades within weeks in direct sun. UV-resistant grades contain stabilisers that slow breakdown of polymer chains and pigment.
The trade-offs are real:
- They cost more per spool than standard equivalents.
- They usually want higher nozzle temperatures and slower print speeds.
- Some grades are fussier about bed adhesion and cooling.
- Colour range is narrower than standard PLA or PETG.
If a UV-stabilised grade is not an option, a UV-protective clear coat applied after printing is a legitimate alternative, it will not match a stabilised polymer, but it meaningfully extends a standard PETG or ABS sign and can be reapplied.
What to ask your printer
When requesting a quote, ask:
- Which filament grade are you using, and is it UV-stabilised?
- What wall thickness and infill will the sign be printed at?
- What finishing and coating will be applied after printing?
A vague answer signals the sign is being treated as a generic print, not an outdoor product.
3D Printed Sign Thickness and Durability
Wall Thickness and Infill Density
Thin walls crack under wind load or temperature stress, 1.2mm walls look fine until a gust or a sharp cold snap hits.
Print walls at 2-3mm minimum for outdoor signs. This adds weight and material cost but cuts failure risk dramatically.
Infill matters less than most people think: 15-20% is enough for most signs, and above 30% adds weight without meaningful strength gain.
Layer Height and Print Orientation
Thinner layers (0.1mm) create stronger parts than thick layers (0.3mm) because they bond better.
Orientation matters more: print so stress runs along the layers, not across them. A sign hanging from a top edge needs horizontal layers, vertical layers peel apart under load.
Imagine where the sign will flex or break, then rotate the model so layers resist that direction.
How to Make 3D Printed Signs Stronger
Design Optimisation for Strength
Avoid sharp corners, they concentrate stress and crack first. A 2-3mm radius makes the sign much tougher.
Add ribs or bracing on the back of large signs.
Make the top edge at least 5mm thick and wide when hanging a sign, thin mounting points snap.
Reinforce screw holes with a boss at least 8mm in diameter, or the hole pulls through the plastic under load.
Post-Print Reinforcement Techniques
Sanding smooths layer lines and removes weak spots where layers did not fuse cleanly, 120-grit, then 220-grit. Slow, but it improves durability.
Epoxy hardens soft plastic and fills micro-gaps between layers: mix two-part epoxy, apply, let it soak in, sand flat.
Fiberglass tape bonded to the back with epoxy creates a composite structure, ugly, but it adds real strength to large signs facing wind or impact.
Custom 3D Printed Sesame Street-Style Light Pole And Sign – Personalized Name →
How to Protect 3D Printed Signs Outdoors
Protection is a system, not a product. A sign fails when any layer breaks down: the polymer degrades, the coating fails, water gets in, or the mounting pulls free. Treat each as a separate problem.
Weatherproofing and coating options
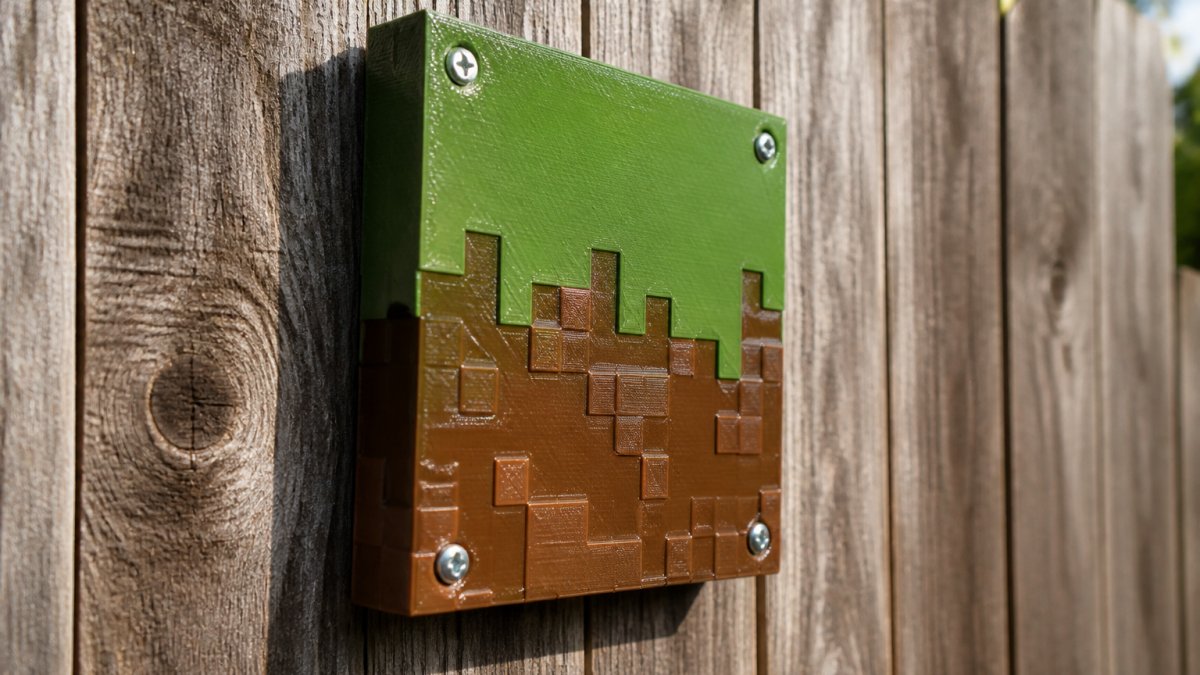
A coating blocks UV, slows moisture ingress, and protects against abrasion and dirt, though not all coatings do all three equally well.
| Coating | UV protection | Moisture sealing | Durability | Notes |
|---|---|---|---|---|
| Craft polyurethane clear | Moderate | Good | 12-18 months | Cheap, easy to reapply |
| Automotive 2K clear | High | Excellent | 3-5 years | Needs proper PPE and curing |
| Marine-grade varnish | High | Excellent | 2-4 years | Good for timber-adjacent signs |
| Acrylic clear | Low | Moderate | 6-12 months | Best for indoor or shaded use |
| Epoxy seal coat | Moderate | Excellent | Long | Adds weight, can yellow |
Application rules:
- Two thin coats beat one thick coat. Thick coats trap solvent, cure unevenly, and crack.
- Sand between coats with 400-grit to give the next layer something to grip.
- Coat all faces, including the back and the edges. The back of a sign is where moisture often enters first.
- Reapply on a schedule. In harsh sun, plan on re-coating every 12-18 months. In milder conditions, every 2-3 years is realistic.
Mounting, load, and failure prevention
Fasteners. Use stainless steel screws, bolts, or rivets.
Reinforced mounting points. A screw hole through a 2mm wall pulls through under load.
Drainage. Never let water pool on or behind the sign.
Adhesive letters. Use marine-grade adhesive or 3M VHB-style outdoor tape. For large letters, combine adhesive with a mechanical fixing or recessed pocket.
Inspection. Check fasteners twice a year.
Practical durability checks before you commit
You do not need a lab to sanity-check a sign. A few simple tests beat any spec sheet:
- UV test: leave a small printed sample on a sunny windowsill or outdoor ledge for 4-6 weeks and compare it against a control kept in a drawer. Visible colour shift tells you whether the filament or coating is holding up.
- Impact test: drop a sample from waist height onto concrete. Brittle materials shatter; tough ones scuff or deform.
- Abrasion test: rub a sample with a scouring pad. This mimics handling, cleaning, and wind-blown grit.
- Moisture test: submerge a sample for 24 hours, then check for warping, layer separation, or weight gain.
- Heat test: leave a sample in a parked car on a hot day. If it softens or warps, it will not survive a sun-facing wall.
Maintenance that actually extends life
- Wash the sign with mild soap and water twice a year to remove dirt and salt build-up.
- Re-coat before the existing coating fails, not after. Once UV has reached the polymer, a new coat cannot undo the damage.
- Replace rusted or loose fasteners immediately.
- Touch up any chips or scratches in the coating with matching clear coat to stop moisture getting in.
A sign that is inspected, cleaned, and re-coated on schedule will typically last several times longer than an identical sign that is mounted and forgotten.
Designing for Durability: Text, Fonts, and Logos
Thick fonts hold up better than thin ones, a serif with 2mm strokes beats a sans-serif with 1mm strokes.
Avoid fine details: text under 5mm tall prints poorly and breaks easily. Make outdoor text at least 8-10mm tall.
Test your design at actual size, a logo strong at 10cm may look fragile at 30cm.
Emboss text into the sign rather than adding it on top. Embossed letters are part of the structure.
Checking Quality Before You Order
Ask your printer for test photos of finished pieces. Real photos show layer quality, surface finish, and colour accuracy.
If unsure, request a small test print first, a 10cm sample tells you how the final sign will look.
Check wall thickness and infill in the quote; if too thin, ask for thicker walls even if it costs more.
Verify the material: confirm PETG or ABS for outdoor work, not PLA. Many cheap services default to PLA.
At Wiggle N Click Prints, we print durable 3D printed signs using quality materials and proper thickness. Our Custom 3D Printed Minecraft Inspired Sign is printed in durable PLA with reinforced mounting points and 2mm wall thickness, perfect for kids' rooms and gaming spaces. We also offer Personalised Sesame Street Inspired Sign with custom names and numbers, ideal for nurseries and playrooms.

Frequently Asked Questions
Which material is best for a durable 3D printed sign?
PLA is the most common choice for custom signs because it's easy to print and produces sharp detail. However, PETG offers better durability and flexibility for outdoor use, with greater resistance to temperature swings and impact. For maximum outdoor longevity, UV-stabilised PETG or ASA filament resists fading and weathering far better than standard PLA. The best material depends on your sign's location: indoor bedroom signs work fine with PLA, but outdoor signage should use PETG or UV-resistant variants to prevent yellowing and brittleness over time.
How thick should a 3D printed sign be for durability?
Wall thickness of 2-3 mm combined with 15-20% infill density provides a good balance between strength and material cost for most signs. Text and logos should be at least 2 mm thick to avoid breaking during removal from the print bed or installation. Thicker walls (3-4 mm) and higher infill (25-30%) are worthwhile for large signs, outdoor installations, or designs with thin, protruding features. Layer height of 0.2 mm is standard; finer 0.1 mm layers improve durability but take longer to print.
Can 3D printed signs be used outdoors, and how do you protect them?
Yes, but they require protection. UV exposure degrades most filaments, causing fading and brittleness within months. Protect outdoor signs by applying UV-protective clear coat, paint, or resin; mounting them in shaded locations; or using UV-stabilised filament from the start. PETG and ASA filaments are inherently more weather-resistant than PLA. Secure mounting with corrosion-resistant fasteners prevents water pooling and wind damage. Regular cleaning and inspection extend lifespan significantly.
What design features make a 3D printed sign stronger?
Avoid thin, unsupported features like delicate serifs or isolated letter connections; these snap easily. Hollow letters are weaker than solid ones. Rounded corners and edges resist damage better than sharp corners. Internal ribbing or lattice structures add strength without excessive weight. Orient text horizontally during printing to align layers with stress direction. For large signs, incorporate a backing plate or frame to distribute load evenly. Test critical features at slightly thicker dimensions if the design allows.
Choosing a durable 3D printed sign means matching material to climate, printing thick enough to handle stress, and protecting the finish from UV and moisture. The difference between a sign that lasts six months and one that lasts three years comes down to these details. Wiggle N Click Prints creates custom durable 3D printed signs with reinforced design, quality materials, and proper finishing. Get started with a personalised sign today and add a lasting custom touch to any space.